
It's been a few weeks since I shared something crochet related, so here I am sharing!
Today, I will share about my new love for shawls.
Yes, shawls.
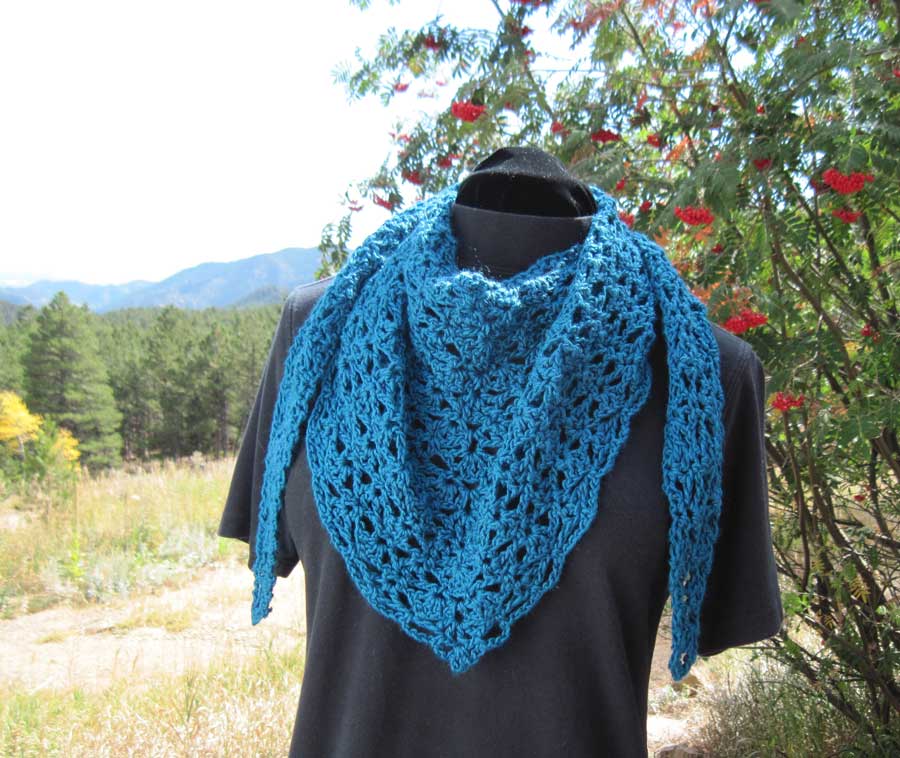
I thought shawls were for old biddies in the 19th century, but they are, in fact, a thing of beauty, and quite versatile. They can be worn in a traditional way, or asymmetrically over the shoulder, or "back to front".


Now, I hope the recipient loves it as much as I do!!! I may even be able to add a picture of her wearing it.... we shall see!
Today, I will share about my new love for shawls.
Yes, shawls.
I thought shawls were for old biddies in the 19th century, but they are, in fact, a thing of beauty, and quite versatile. They can be worn in a traditional way, or asymmetrically over the shoulder, or "back to front".
I am a personal fan of the "back to front", but the other two ways to wear it would be great for a wedding. I think it would also be nice with a light jacket in the spring and autumn, or to keep you neck warm in the winter, with a slightly thicker yarn. Hmmm, I think I need to work on making myself one....
This shawl is SO simple to make. It's called "South Bay", and it's FREE!!!! You can find it here.
This was my first crocheted item which I used a chart more than a written pattern.
Due to the simple nature of this pattern, and because it is a 2 row repeat, the picture pattern is nice to follow. If you have never tried doing it this way, this would be the perfect start to understanding them. Read through the written one, whilst looking at the picture pattern, and you will quickly pick up how it works. This pattern is so simple, I can now do it without looking at the pattern at all. It doesn't make me clever, it just means it is VERY easy!
So, let me show you mine.
This is it pinned out on the bed (I will explain in a moment...)
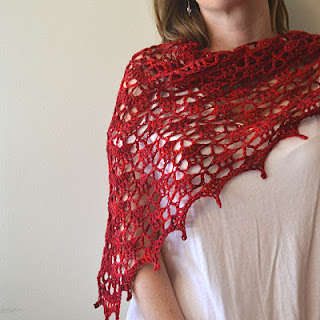
This is a close up of the detail in the pattern.
When you hook up this pattern, it will all be kind of "squished", with the detail not very clear. By blocking, you open up the pattern, by stretching it all out. You can leave it unblocked, and it would still look lovely, particularly with slightly chunkier yarns. This, however, was a lovely merino/nylon sock weight (fingering), and lent itself to being blocked. It looks beautiful, and web-like, I think?
I will also add, about the yarn, that it was a custom dyed yarn, from Felt Fusion. You can find Shadow's page on Facebook, and she also has an Etsy shop. This was EXACTLY what I asked for - black, with a splash of red and purple. It's turned out better than I even imagined. So, thank-you to Shadow. Hand-dyed yarn IS more expensive than other "pick it up off the shelf" yarn, but, especially for gifts, it is TOTALLY worth it!
So, blocking. I can only share, at this time, how you block an item like this. I know you can do it for individual blocks, say, in a granny blanket, to make them all the same size. However, I cannot speak of this from experience, so will leave that particular angle for just now. I am guessing the general principle is the same?
You need a large area to block on. In this instance, I used the spare room bed. Perfect for something big like a shawl. You can also use those foam mats that are for children to play on - you can get hopscotch ones, and alphabet ones? Anything that is soft, and that you can push pins into, basically. You will also need, then, pins. Decent, sturdy ones.
The next part depends on the yarn you are blocking. Certain fibres can tolerate steam blocking. Certain ones are better to use a technique where you spritz it with water then let it dry. I have used both, but as this one was a nylon/merino blend, I did the spritzting method.
I got my shawl, and spread it on the bed. Starting in the top corner, I pinned it into the mattress. I found that you need to put them in angled inwards as you push them in, if that makes sense? They anchor more securely. I worked my way along the top of the shawl to the other corner, pinning at regular intervals. I then pinned the bottom point, and then worked up the diagonal edge, one side at once. This particular pattern I had added a picot edging, so I pinned at the tip of each picot. Then, I spritzed the whole thing with water, until it was damp all over. Next, I went around the whole shawl again, pulling it all out even further. You can pull it out as much or as little as you want, within the limits of the fibres. The "harder" you block, the more stretched out it will be. After you have stretched it out to where you want it to be, you just leave it to dry. If you have a nice warm spare room like mine, it won't take long.
You can also block by soaking the whole item, and then pinning it, before it dries. You can also pin it out, then use an iron on steam setting, and holding it ABOVE the work, making it damp all over. As I said, you can't do that with ever fibre. If you look here, you will see a nice overview of the ways to block, for the different fibre types.
Once it's dry, just remove the pins, and you are good to go.
I would also recommend, having done it today, that when you "weave" in your ends, that you use a sharp darning needle, and actually work INTO the fibre in the item, with the end of yarn, so it pretty much becomes the same strand of yarn you are weaving into. It seems to look good and you can't see where you have woven it in.
So, there you have it - the South Bay shawlette.
I have plans to now try a few more different designs of shawl, and I will share with you as and when I do them.
I will also tell you , you can search on Ravelry according to what item you want, what type of yarn you are using, and what yardage you have. You can also choose to only look at free ones, of which there are quite a few. I only found this out fairly recently, and it's handy to know you can refine your search like that.
The other thing to bear in mind, is that many of these patterns you can do with many weights of yarn, by just changing which hook you use. This one, as I said, was sock weight, with a 5mm hook. You can just try it out, and see how it goes. I also saw some lovely ones, when I was googling images for this post, where people have used several different yarn colours in one shawl - google the South Bay and you will see how many variations you can have for one shawl pattern!
Now, I hope the recipient loves it as much as I do!!! I may even be able to add a picture of her wearing it.... we shall see!
That is beautiful.
ReplyDeleteOh WOW, Caroline. I had no idea you were making this shawl! It is simply stunning. The colours are *gorgeous* - really striking - but the workmanship is really something else!
ReplyDeleteI'm bowled over :) x